
A protocol is the set of bars your client trains with. Every bar answers three questions: what is measured (a frequency band, a ratio, …), where (the positions) and in which direction it should go (reward or inhibit). This page builds a protocol step by step. What the options do in detail is described in Protocols.
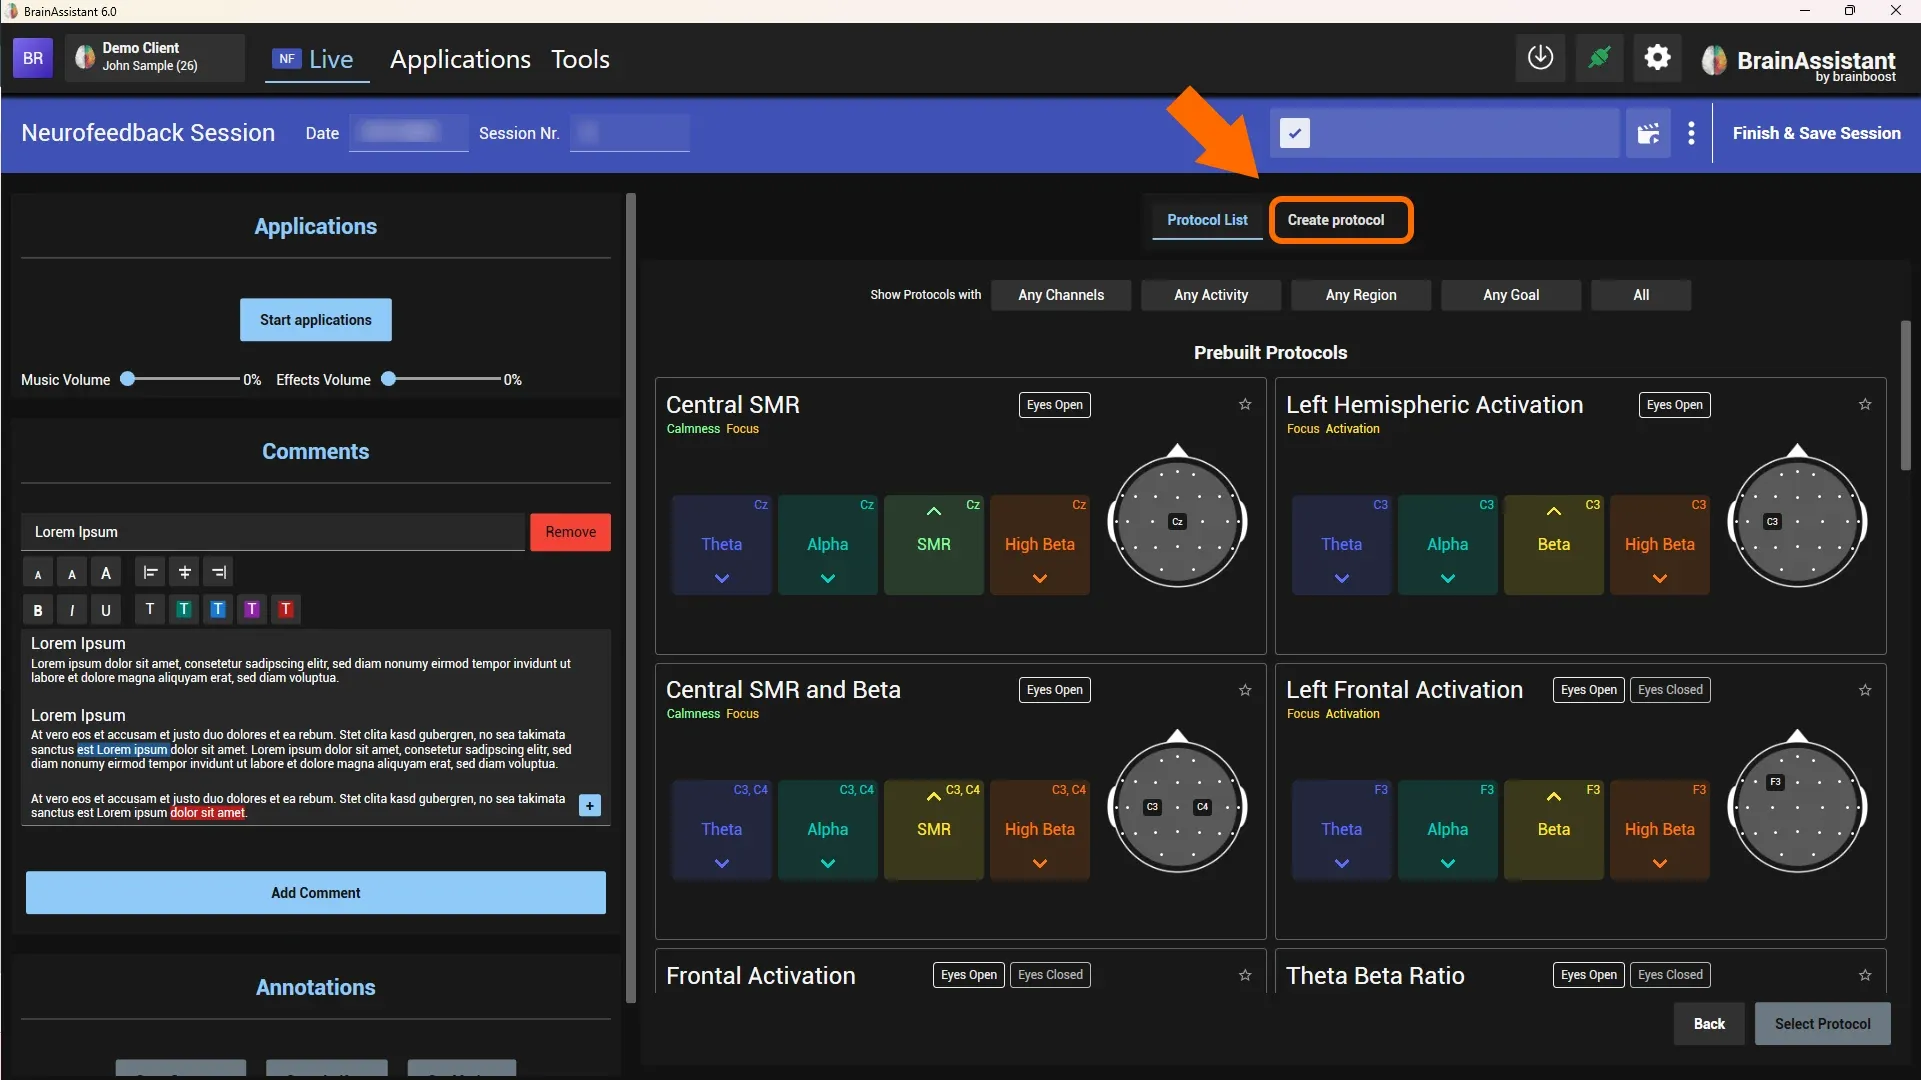
Open the protocol creator
- Start a Training Session and continue to the protocol step, as described in Training session.
- Click Create protocol.
Add the bars
- Enter a name for the protocol at the top.
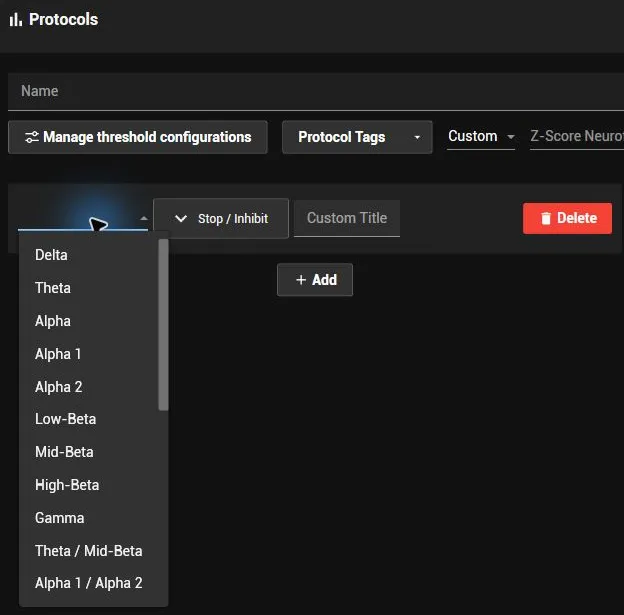
- Click Add once for every bar you want to train.
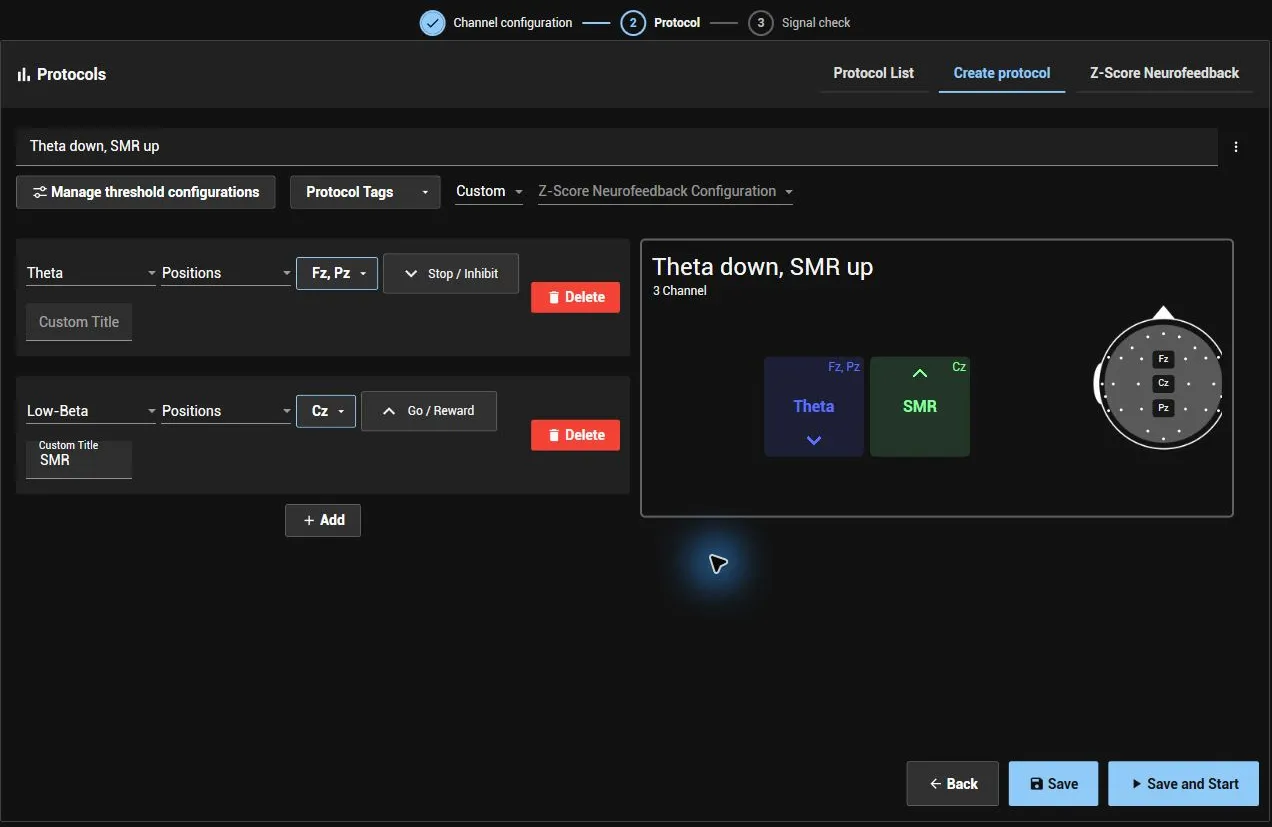
- Set up each bar from left to right:
- Calculation (the first list): what the bar measures. Pick a frequency band (for example Theta or Alpha), or Custom to enter your own start and end frequency.
- Position: where it is measured, for example Fz or Cz.
- Go / Reward or Stop / Inhibit: the direction; click the button to switch. A Go / Reward bar is successful while its value is above the threshold, a Stop / Inhibit bar while it is below.
- Custom Title (optional): your own name for the bar, for example “SMR”.
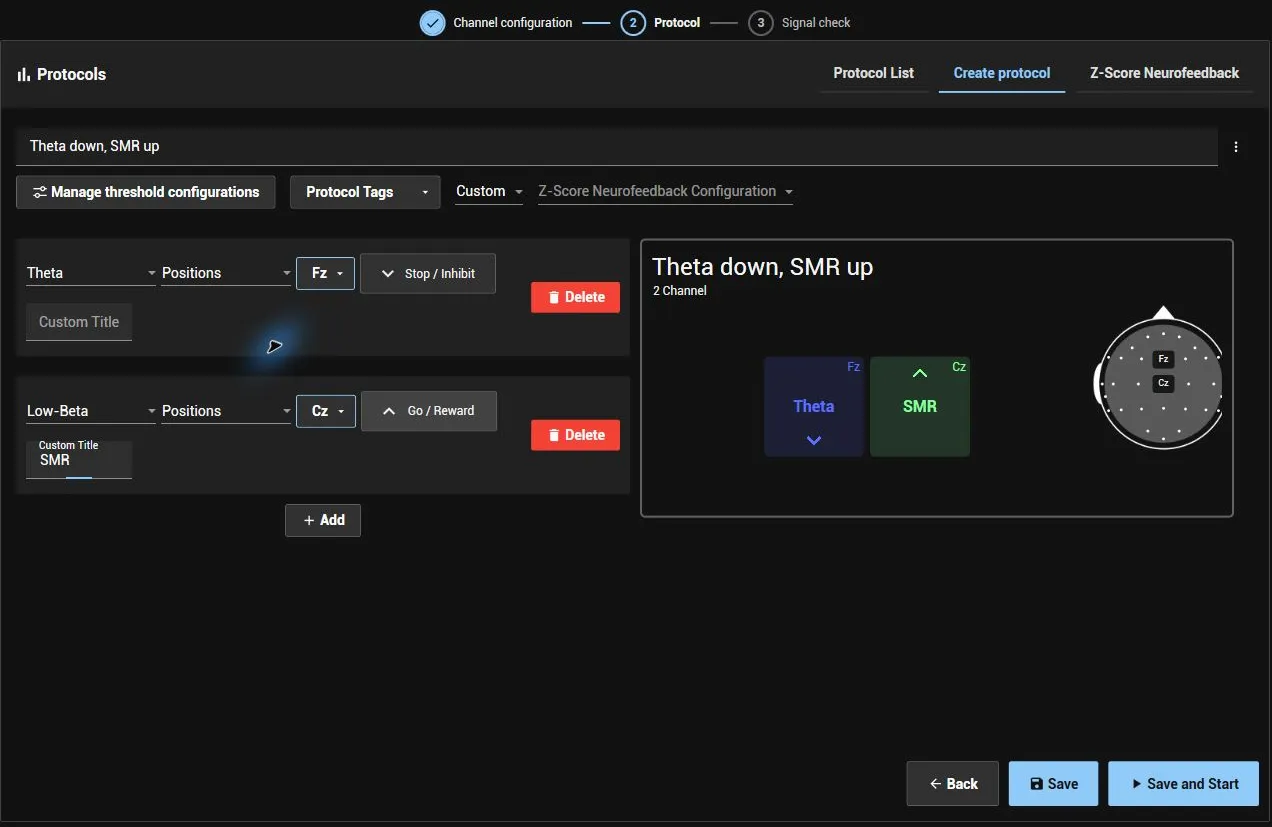
The preview on the right shows the bars with their directions and the positions on the head. In this example theta at Fz should go down and SMR at Cz should go up:
Train the ratio of two bands
A ratio bar divides one frequency band by another at the same position, for example theta divided by beta.
- Choose one of the ready-made ratios (for example Theta / Mid-Beta) or Ratio as the calculation.
- With Ratio, pick the two bands yourself: the upper band is divided by the lower band. Tick Custom Frequency-Range to enter your own frequencies for a band.
- Choose the position and the direction as for any other bar.
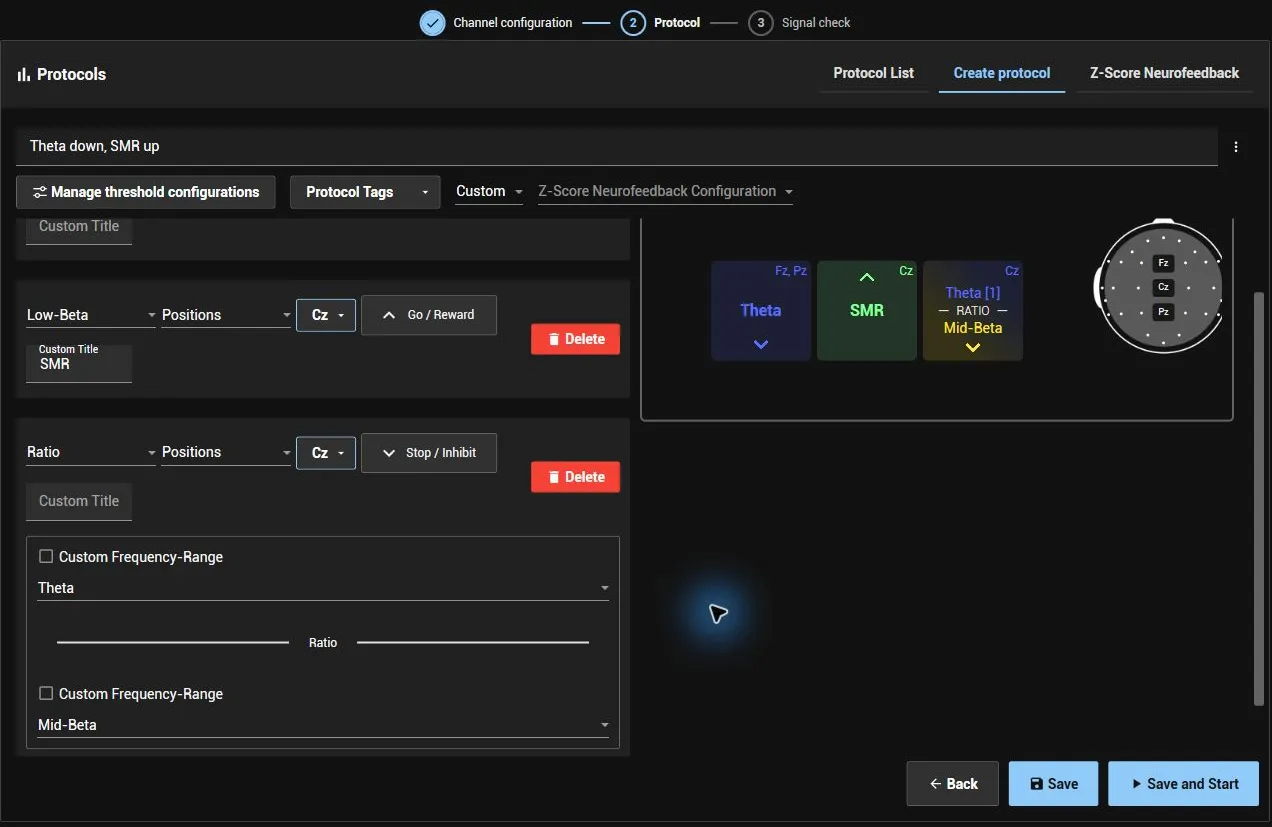
A value of 2 means the upper band is twice as strong as the lower band. To bring a theta/beta ratio down, set the bar to Stop / Inhibit.
Use several positions or a bipolar derivation
Several positions in one bar. Select more than one position. The bar shows the average of these positions.
Bipolar. Switch the bar from Positions to Bipolar and choose the Active and the Reference position. The bar then measures the band in the difference between the two positions.
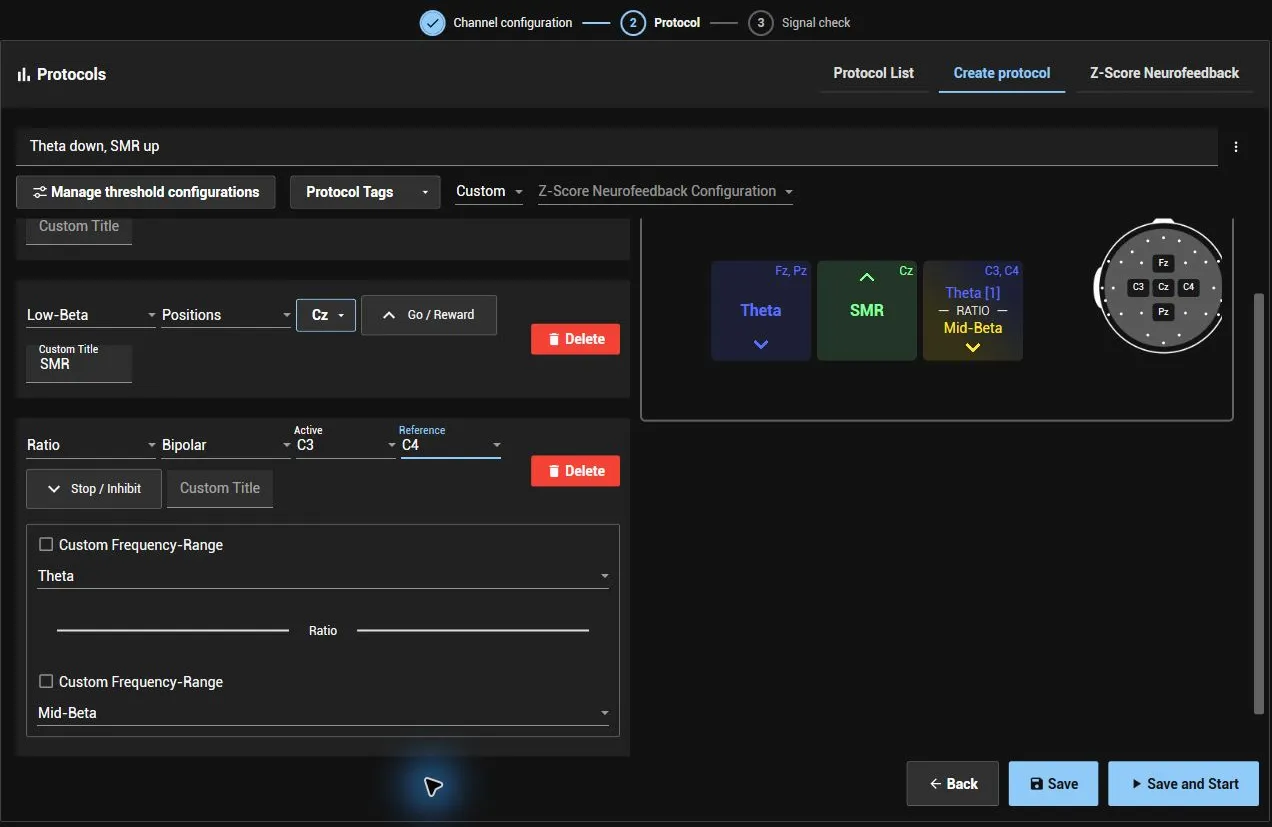
Neither of the two compares the positions with each other: several positions are averaged, a bipolar bar measures their difference signal. To divide the value at one position by the value at another, use your own formula as shown in the next section.
Compare one band at two positions
Some protocols train how strong a band is at one position compared with another, for example theta at Fz divided by theta at Pz. For this you write the calculation yourself once and then use it like any other calculation.
Create the formula
- Open Tools and, under Calculations & EEG Data, EEG Calculation Formulas.
- Click Add, then Edit on the new entry.
- Enter a Title, for example “Theta Fz / Pz”.
- Click Add to create one input for every value the formula needs. For each input set:
- ID: a short name without spaces, for example
ThetaFz. - Calculation: Amplitude.
- Position: for example Fz.
- Start Frequency and End Frequency: for theta 4 and 8.
- Epoch seconds for live calculations: how many seconds of signal the value is calculated from. Use 0.5 for theta (more in the calculation details).
- ID: a short name without spaces, for example
- In Calculation at the top right, write the formula with the IDs of your inputs:
ThetaFz/ThetaPz. - Click Save.
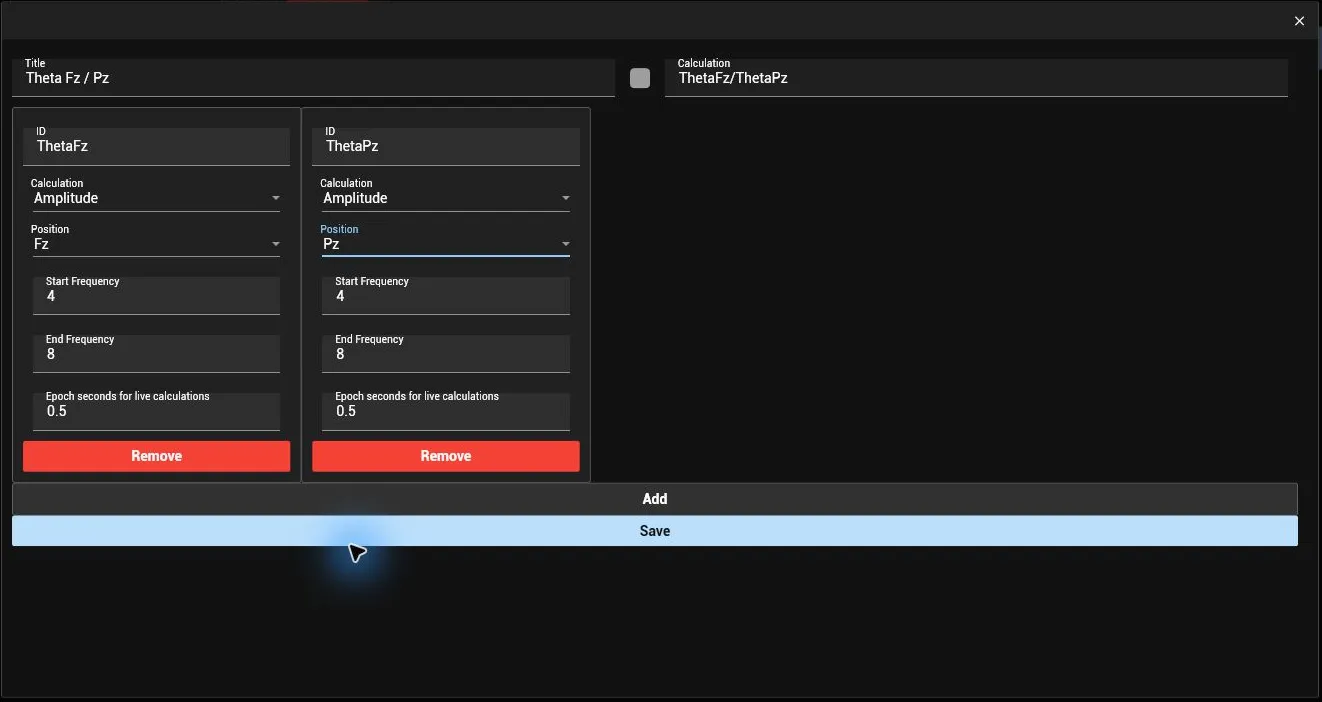
A new input starts at Cz, without a frequency range and without epoch seconds. Fill in all fields of every input, otherwise the bar shows no useful value.
Use the formula in a protocol
- In the protocol creator, add a bar and choose Advanced EEG Calculation Formulas as its calculation (the last entry of the list).
- Select your formula in the list next to it.
- Choose Go / Reward or Stop / Inhibit.
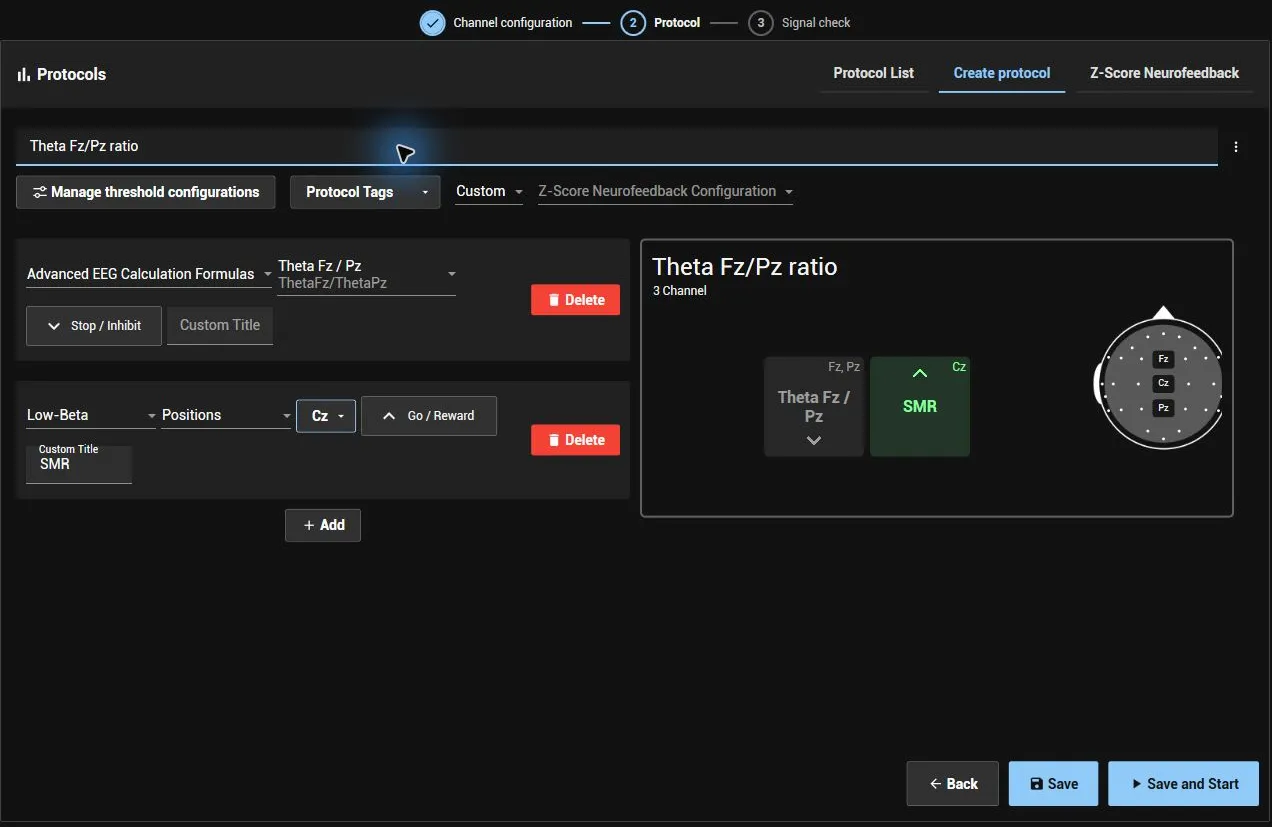
The bar shows the ratio as a plain number: 1 means theta is equally strong at both positions, 1.5 means it is 50% stronger at Fz than at Pz.
Bars show their value with one decimal. For a finer scale, multiply the formula by 100:
ThetaFz/ThetaPz*100shows the ratio in percent (150 instead of 1.5).
Save and start
Save adds the protocol to your protocol list for later sessions. Save and Start also continues to the signal check, so you can train with it right away.
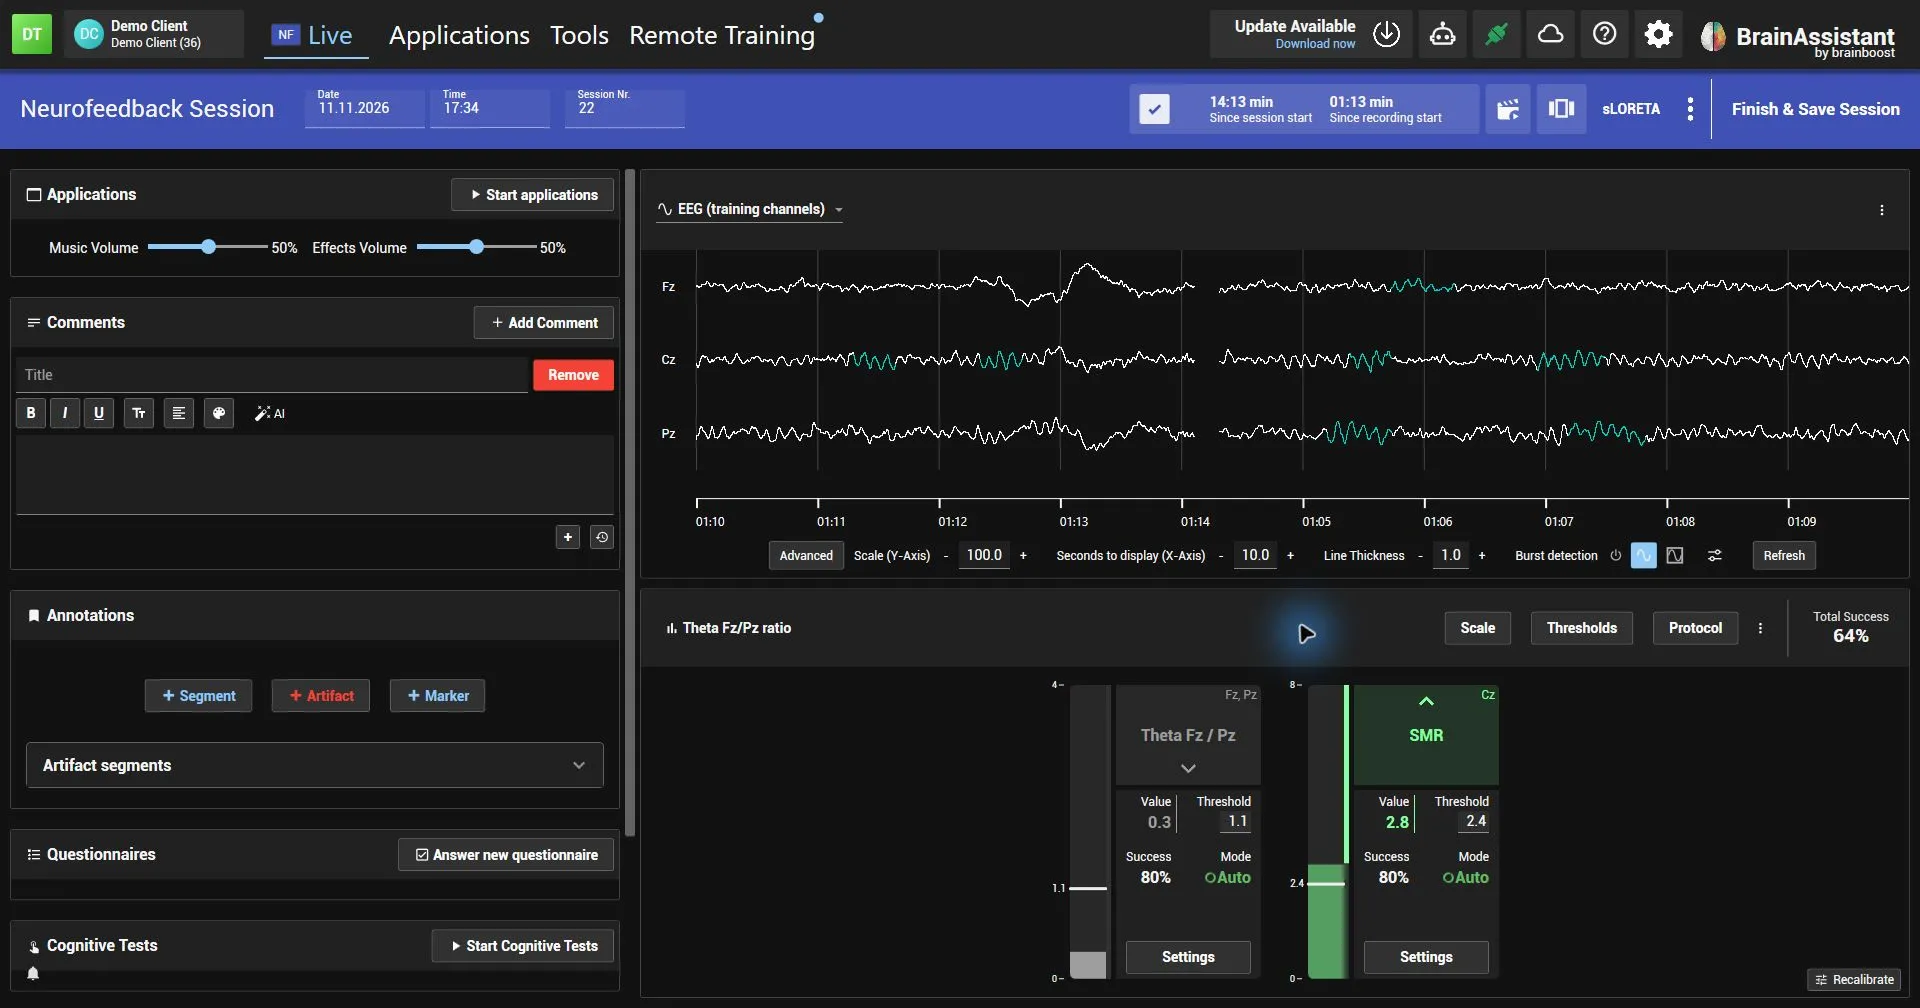
From here on a custom protocol behaves like a prebuilt one: set the thresholds as described in Adjust thresholds and choose which bars control the game in Set up the game feedback.